
In my travels, I have seen samosas in every variation. Small ones, big ones. Vegetarian ones, meat ones. Fried ones, baked ones.Many countries around the world have their own samosa and in many cultures it holds the same positive associations it holds for me, a food that goes hand in hand with happy memories.
Since we don't have a car in DC and since I love samosas more than just about anything, I decided that I would make them at home. I remembered making them with my mom when I was quite young so I figured I was half way there. My mom used to use those freezer pastry sheets and I planned to do the same, until I saw the nutrition information on a packet Feraz brought home for me. At about 15 grams of fat, 225 calories and a very low nutritional grade, the ten dollar a pop pastry sheets were promptly returned. I didn't feel comfortable making something quite that bad as a snack for us or to serve to our guests.

I looked up some recipes for the pastry and it was easy enough to make myself. All I needed was:
- 2 cups flour (you can use wheat or any flour you prefer but in this case I used unbleached all-purpose flour)
- 6 tablespoons melted butter. (I like to melt the butter on the stove and then let it cool for a few minutes before using. It seems to get a better result than just melting in the microwave. I also found that using vegtable oil as a substitute did not work.)
- 1/2 teaspoon salt
- 6 tablespoons water

Mix the flour and salt and making a well in the middle, pour the butter in. Add the water little by little, as needed. At first the dough will feel too dry and crumbly but as you continue to knead it, it will get softer and smoother. If you are having major problems getting the consistency you want, I have found that adding additional melted butter helps.
After you have prepared the pastry dough, cover it and set it aside so you can make the filling. You have lots and lots of room to be creative with the filling. You can modify it so the flavors you love will really stand out. If you want to start with a basic filling though, this is loosly the recipe I used.
- 4 large potatoes (which I boiled the first time, but microwaved in the future for a much faster process. Just make two cuts in the potato and put it in the microwave for 6-8 minutes per potato depending on your power)
- 1 large onion finely chopped
- 1 1/2 cup of frozen peas
- 1 3/4 spoon of salt (I use the regular sized spoon for these measurements, so something like a plastic spoon would be a good reference point. Sorry!)
- 1 1/2 spoon of red chili powder
- 1 1/2 spoon of cumin
- 1/2 a spoon of whole corriander (smash these between your palms to help release the flavor and aroma but to still keep the texture they provide.)
- 1 clove of finely chopped garlic
- a small bunch of cilantro, very finely chopped
- 1 green chili, finely chopped
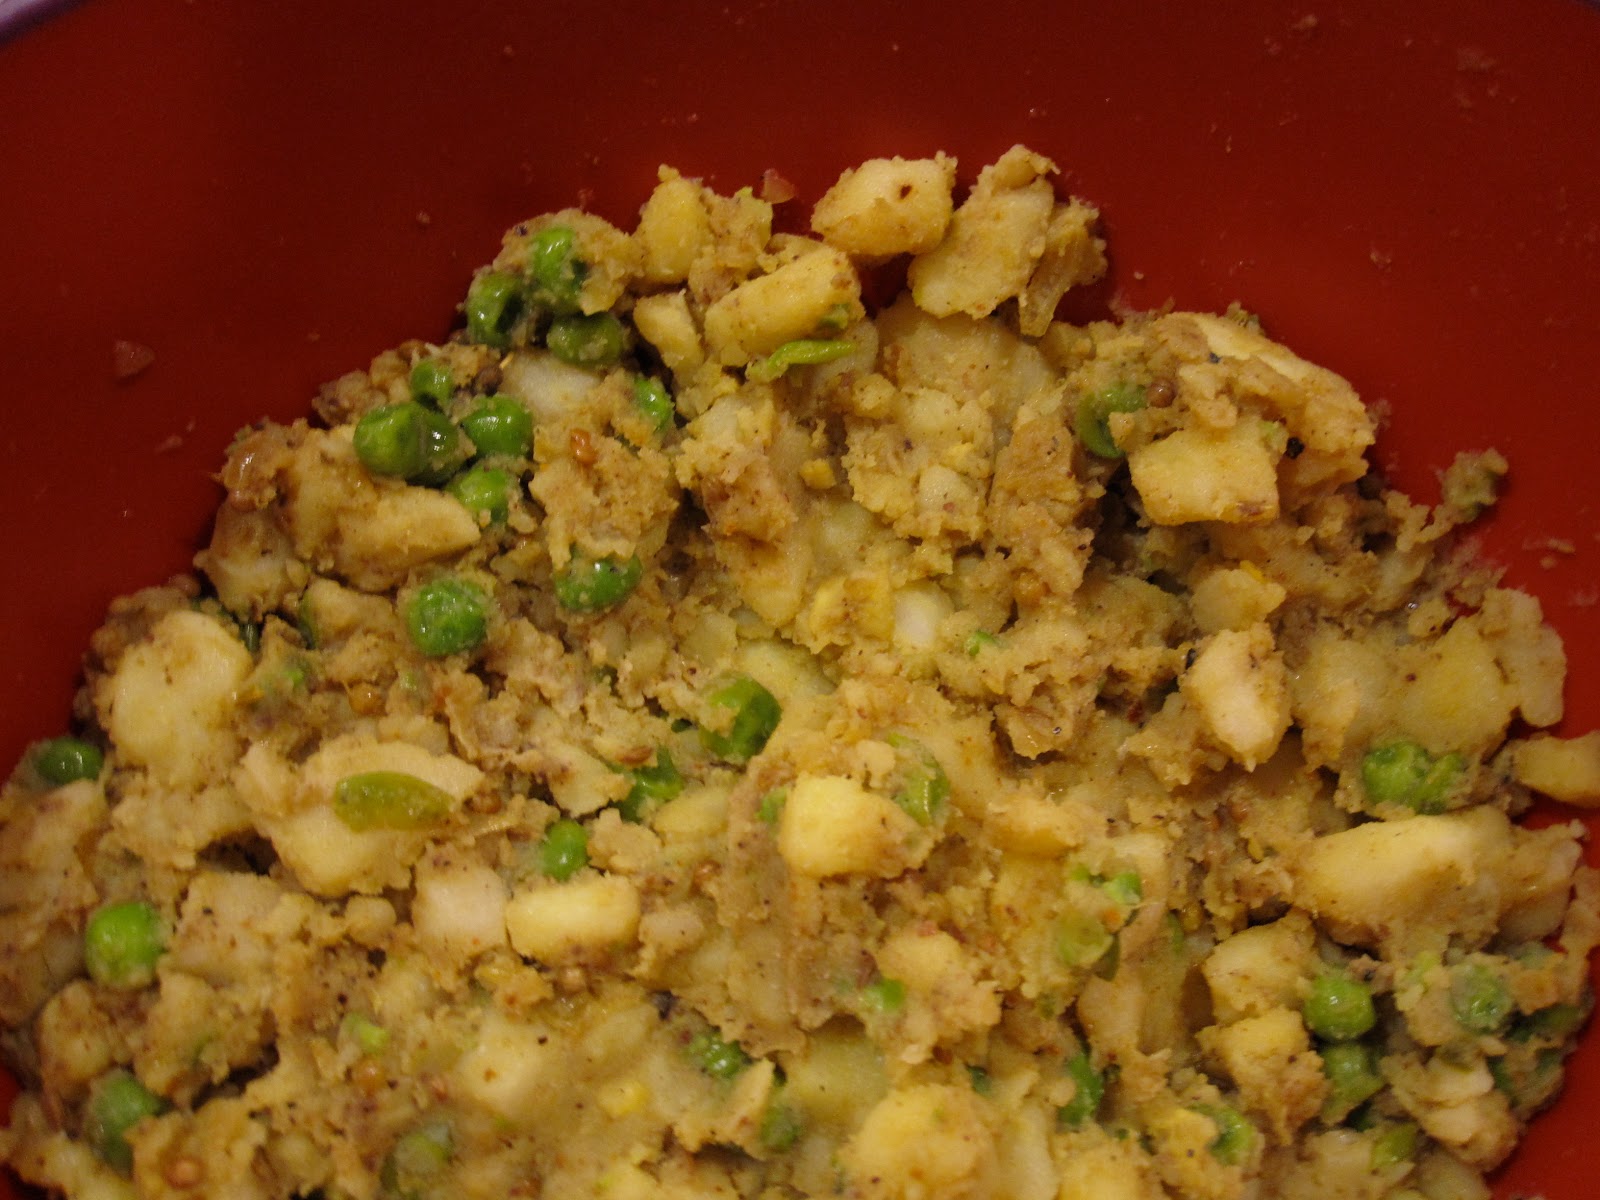
After you have peeled your microwaved or boiled potatos, dice the potatos up and mix them with all the ingredients above on medium heat for a few minutes, until everything is mixed nicely. It doesn't have to look pretty but I do recommend aiming to keep the potato pieces as uniform in size, as possible which I didn't do this first time around.
Now, its time to move back to your pastry. Take a handful of the dough and roll in your hands untl you have a nice little dough ball. Press the ball down onto the surface you are working on and then with a rolling pin flatten in out until you have a pita sized piece of dough. This does not have to be pretty or precise! Cut the dough into two pieces with a butter knife. Again precision is not necessary here. It will not matter at all once you make the samosa. In the picture below you can see my pastry looks nothing like a cicrle and I cut it in half wherever I felt like it. Then, take 1-2 tablesppons of your filling and place it on the middle of the pastry. I made the mistake of overstuffing my pastry the first time I made it but a little bit actually goes a long way and you want to make sure you will be able to close the pastry up.

To finish the samosa, you want to make a triangle shape. You will want to fold the pastry so what was the straight cut is folded upwards. So you can take the two corners above (in the lower half pastry) and fold them towards you for the result below. Take your thumb and press the excess dough together to seal the samosa. I have heard that brushing an egg onto the dough helps to seal the dough but I didn't notice any real difference when I did this and when I didn't. Just try to smooth everything down as much as you can so it beomes one solid shell.

For a traditional samosa, simply deep fry these in a pan of oil. (We use olive oil becuase it makes us feel slightly better about the indulgence.) These are best served with a nice mint chutney (I will post a recipe for that soon).

Since the prep work for the dough and filling can take a little bit of time, I just like to make a whole bunch and freeze them so I can whip them up quickly for any surprise guests we might get. It might be good to start with smaller batches until you tweak the recipe to get it just the way you want though! I made beef samosas using this same basic recipe but substitute beef for potatoes and cook for a bit longer so the beef is well done. I also made the samosas about half the size for the beef ones and reduced the filling accordingly.

I hope you have fun trying out this recipe as the weather starts to get colder. I would love to hear any tricks or tips you have for making samosas.
Mmmm, those look so good!
ReplyDelete