When we lived at our old place, there was a huge blank wall above the dining table. It looked so unbalanced with the bookshelves facing it and I spent quite some time thinking about what I would like to put there. I considered putting up mirrors to reflect the books or framing a large tapestry but neither of those things seemed personal enough. Then, I saw this great project on YoungHouseLove, one of my favorite DIY blogs.
 |
| To solve a similar large blank space problem, YHL created a cohesive frame gallery. |
I thought the Ikea ribba frames were such great statement pieces and at $20 a pop they were a steal. (It looks like they don't have the colors that YHL or we used anymore but on the bright side, the price has gone down!)
 |
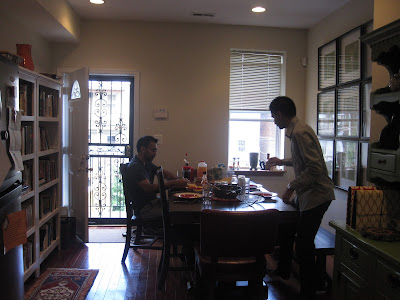
| You can see the empty wall over the dining table here. |
We brainstormed a lot of ideas of what to put in the frames. We considered doing record album covers and even printed out a bunch but just didn't feel it when we looked at them placed. We then thought about doing photographs from the places we had been but it seemed a little cheesy and quite frankly, neither of us has very good photography skills. We finally decided on something that was sentimental to us and also gave us a great project to work on.
 |
| Even more apparent here. |
We decided to do "maps" of all the places we lived. We went to Paper Source and picked out a "background" and chose different patterned papers for our "maps." (I might be abusing quotes here. I don't "know.") We cut out the shapes of different places we had lived in and pasted them on the green background paper. Although this was a bit time intensive, we loved the result.
 |
| We went with the newspaper method first but realized it wasn't lining up properly. |
Anyone who has put up a frame grid knows it can be a little tricky to line everything up just right. Luckily YHL had some great tips here and here on how to get the nails in right on your first try. Basically, just take the papers that comes in the frames and tape them on the wall where you want your frames to go. You can play around with the papers until you get them just right and then just hammer the nail right into the paper, pull off the paper and hang the frame.
 |
| Using the paper that came in the frames was much more accurate. |
 |
| What a man what a man... We didn't use the nail method here because we were using the wire hanging kits that came with the frame. |
 |
| Here is Feraz with the finished project. In his Sunday morning best. |
 |
| What nights used to look like for me. You can see how the frames don't lie flat here. |
 |
| Another shot of the dining room. This time with frames. |
 |
| The gallery at our new apartment. Sorry for the terrible quality of the pictures. |
 |
| A little closer. |
 |
| You would be shocked by how many people don't guess this one. See how nicely the frames hit the wall here? |
looks FABULOUS! love the dc one. what is the middle one?
ReplyDeleteThe middle one says "you are here." we haven't lived in nine places between us... yet!
Deletewhen we move (some day), and i have a huge blank space (possibly) i'm going to steal your idea. or call on you to do it for me. yes. i like option two better.
DeleteI'll be there! Few things I like more than decorating. :)
Delete